30.7.10

Busy Bee!


I have gotten a bit behind with posting about my bee blocks. Oops! This morning I was able to mail off the last one for July, so I thought I would post a little recap of my bee blocks this month.  Enjoy!

For my Red & Aqua 2 Bee - 10 Point Star Block for Mollie 2010.  Pattern from www.lenzula.com/patter/free/stars.php


For my Pretty in Pink Bee - Two blocks for nmommy02

For my Sew 2 Speak Bee - Two blocks for ibmomof2, pattern from Material Obsession Two

For my Ravishing in Red Bee - Five Pointed Star Block for chickentracksetc~Sara~


For my Sew Modern Bee - circle block of choice for nicoles_rainbow


Fabric for Robyn & Matt's Quilt


Fabric for Robyn & Matt's Quilt
Originally uploaded by cilvee
The fabric finally arrived for the quilt I am making for my good friends, Robyn & Matt. After almost ten years together they are finally getting married and everyone is very excited!  Their wedding is next summer, so I have lots of time to finish this quilt...oh wait, except that I have TWO quilts to make for next summer! I hope I can finish them in time.

Antiquity from Michael Miller

25.7.10

Bee Block Tutorial - Tippecanoe

For my month (August) in the Ravishing in Red Bee I chose the 
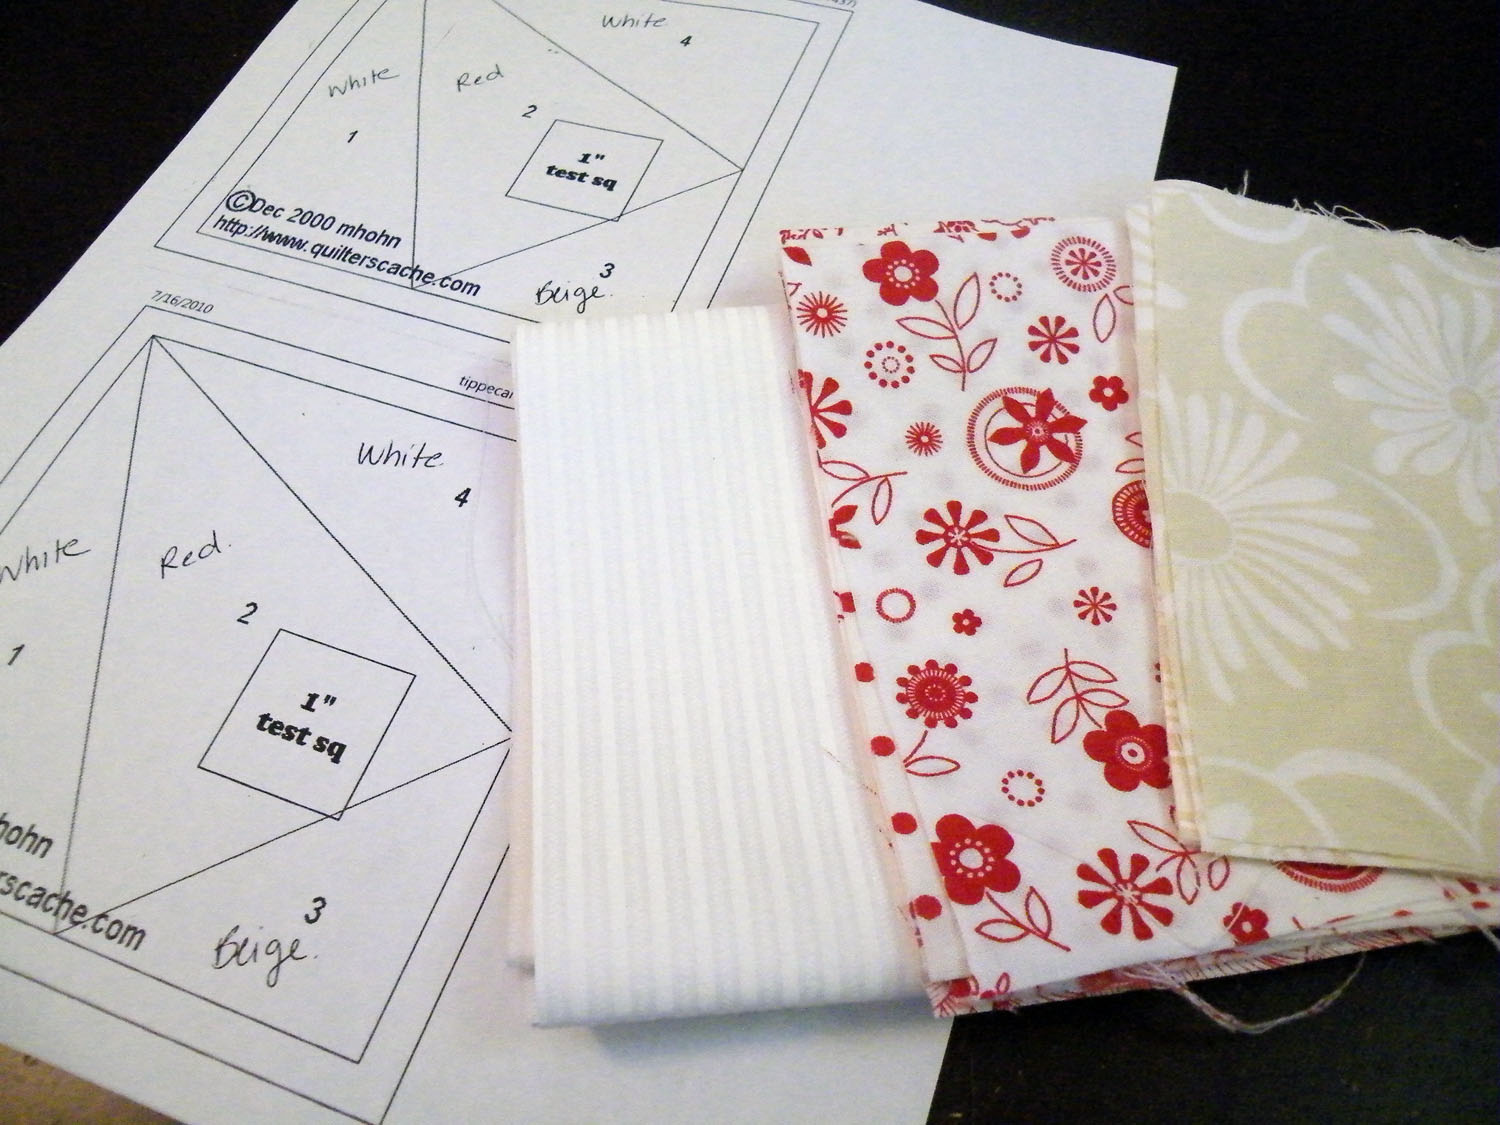
Tippecanoe block from Quilt Blocks Galore.  From experience, I know that though I really enjoy paper piecing, other people may not. So I am hoping that by providing this tutorial I might help alleviate the pain and frustration of paper piecing for some people.  I want to assure everyone that though is seems complicated, it isn't that bad!

To begin with, I printed out the paper templates and wrote on each numbered area what colour should be used in that area, so as to avoid any confusion.  For my blocks, I want the beige fabric used for the centre triangles, the red for the big triangles, and white for the background.


For my Bee, I sent everyone enough fabric and paper templates for two blocks.  To my fellow Bee members, if you can make two I would be grateful, but I realize that it is summer and everyone is busy so if you can only get to one then don't worry about it!  I will be happy with whatever you are able to do.

Now to begin the block!  To start, I find it easier to fold the template along the lines so that you have a bit of a guide on the blank side of the template.


Also, because the white I chose for the background is a stripe I cut out the triangles that would be used for the background right away so that they would somewhat line up.  There isn't really a science to this, but I took the fabric and placed it right side up on the wrong (blank) side of the paper template and lined up the stripe so that it ran parallel to the edge of Side 1 of the template for the first white piece and Side 4 for the second (piece four). 


Cutting each of the two white pieces separately, I folded back the template and cut out the triangle piece.


Doing this, I ended up with my two white background pieces with the stripes running in the same way.  For the next step, I put aside the background piece for section four and pinned the background piece for section one in place.  Then I took a red piece and placed it right side down and lined it up along the fold I had previously made in the paper template with 1/4" hanging over the fold for the seam allowance.


Once the red piece was pinned in place, I flipped the whole thing over and sewed along the inside line of section one.  When sewing along the template line, I find it easiest to start sewing just outside of actual template, which will help eliminate ragged edges.


Once I was done sewing, I pressed the red piece open and held it up to the light to make sure the fabric was covering the area that needed to be covered.  I am sure everyone knows what I mean when I say how frustrating it is when you've sewn the piece on wrong and have to rip it all off in order to try again.


As you can see from this picture, my red piece definitely covers the area it needs to and I can move on to trimming the seam allowance.  I always make may fabric pieces a bit bigger than I need, because I want to make sure it will fit.  Since I do this, if I left the seam allowances as is I would have some pretty bulky and uneven edges.  To fix this, I folded the "good" pieces back to expose only the seam allowance and trimmed it to 1/4".


With all of the fabric that is now covering the paper template it isn't so easy to see the folded edges that I have been using to help line up the fabric, so for the last couple of sections, I re-fold it and finger press the fabric so that I can see the edge.


Continuing on I finished sewing on and pressing out section three and four (four, using the background piece I had cut out previously) and after pressing the whole block I flipped it over and trimmed the block around the outside line of the template to create a neat and tidy block.


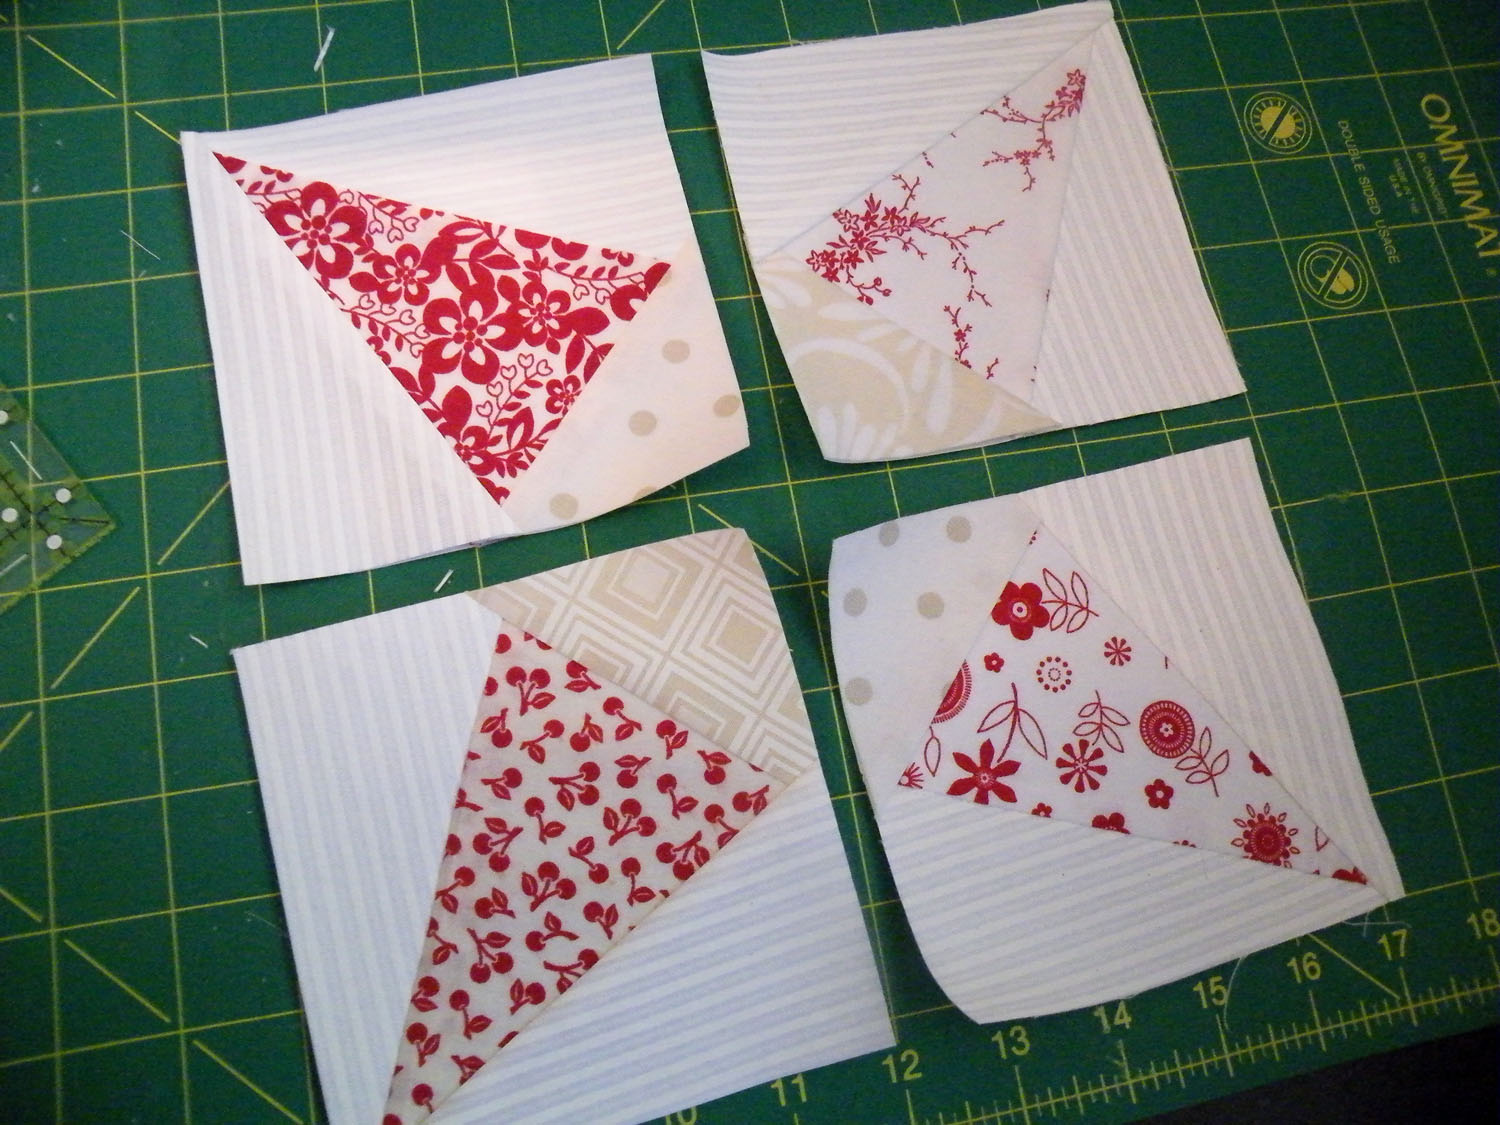
Each paper template makes one quarter of a finished block, so after making three more I had my four finished quarters.  When these were finished, I carefully tore the paper off of the backs.


Then I sewed the quarters into halves.


And finally those halves were sewn together into one finished block.

Voila!


I hope that this tutorial helps a bit with the construction of this block!  Being my first sewing tutorial, if you have any suggestions (or notice a mistake!) please let me know.

For my fellow Bee members, enjoy!

24.7.10

Drat!

It has been raining off and on pretty much all summer, and today was no different.  One thing I have to say off the bat is, I love, love, love the rain.  On those mornings when I wake up to a nice heavy summer rain, all I want to do is stay in bed with the window wide open, reading.  Bliss.  

Unfortunately, no matter how much I like the rain, it can also be rather destructive.  Today, Andrew was cleaning up the basement and noticed that the carpet was wet behind the rec room couch.  In true Andrew fashion, he immediately started ripping the panelling off the walls and pulling up carpet.  We were planning on redoing the rec room and taking the panelling down, but not so soon!  Anyway, turns out the windows that are below grade have been leaking and last I heard Andrew was pulling out chunks of sopping wet insulation.  

Now, I know that I should probably bring myself to go down and take a look at the damage, but I am just not in the mood. Right now, I just want to try to continue to enjoy the rain....

I'll have to deal with it soon enough.


21.7.10

Modern Swapping

This summer I joined a swap called Modern Swappers and so far everyone has been posting fabulous pictures of things they have prepared for their swap partners.  A blind swap, we are to create a package of 1-1/2 yards of modern fabric, a handmade item, and something for our partner's sewing room such as a decoration, tool, or collectible.

With all of the evidence of progress, I feel like a slacker!  So far, after flickr stalking my partner for weeks, I am fairly confident of what I will be making them.  I just have to sit down and actually make it!  One thing that I have  done is gather the fabric.  Today, my package arrived from Hawthorne Threads, with my partner's fabric inside. Yay!  I hope she likes it!

16.7.10

Worth It

Some things are just worth the work.
Mmmm...fresh peas....

3 down, 2 to go


Sew 2 Speak - July Blocks
Originally uploaded by cilvee
Yesterday I worked on some bee blocks. For my Sew Modern Bee, Nicole (nicoles_rainbow) asked us to mail back the finished block without posting pictures so that it would be a surprise for her, so I will have to wait until she receives it to show it off - though I was quite happy with the way that it turned out!

The blocks pictured her were for Liz (ibmomof2) and they turned out quite nicely as well. I love the cherries in the corners, I think they are just so fun! This pattern was from the Material Obsessions 2 book but I forget off the top of my head what it is called. Does anyone know?

I had some trouble lining up the points in the centre of the block. By the time the rest of the block is sewn together, there is quite a lump in the middle that is hard to work with. They are a little bit off still, but I hope they are something Liz will be able to work with.

15.7.10

Close Call

This evening after work Andrew and I met at a friend's farm to gather up slate rock to use for a new patio (there was lots, and we were told to help ourselves.  Thanks Jason!).  We filled up the back of the pickup truck and then both went our separate ways to head home.  I was parked out by the road and had hopped the fence into the field, and Andrew had to drive the truck around and out a ways down the road from where I was.

Anyway, I got to the car and realized...my car keys...were in Andrew's truck!!  Being a city girl, I had locked the car - with my cellphone in it.  So I had no way to call him, no way to flag him down (the driveway was over the next hill) and as I started to jog up the side of the road picturing myself totally missing him and having to walk across the fields to our friend's place - a trip that takes a good 15-20 mins by car, all the while losing daylight, it occurred to me that I have a two-way remote start/security system in my car.  So back to the car I went.  I am sure this system was not made for this reason, but it works!  All I had to do was trip the car alarm and my key fob went nuts in Andrew's truck.  I grabbed the car door handle and started rocking the car as hard as I could.  Sure enough, it worked.  From wherever he was, Andrew was able to unlock and remote start my car so that I could sit in the lovely a/c while waiting for him to arrive with my keys.

Another reason why I love being married to guy who sells auto accessories, the too cool gadgets!

14.7.10

I won!

I keep entering giveaways on different blogs that I follow with the hopes of winning, and it finally happened!  Thanks to Heather from A La Mode Fabric who hosted the giveaway and Fat Quarter Shop who sponsored.  Yay, now to shop!

Dragging myself back to the gym...

And I mean dragging!  The last week I have had a cold, all stuffed up with runny nose, headache, sore throat, cough, the works.  Needless to say, I gave myself a little break from the gym.  I thought it wouldn't help anyone if they had to pick me up off of the floor gasping for air.  Today was my first time back since I started to get sick and to ease myself into things I took the BodyFlow class which is a mixture of tai-chi, pilates and yoga.  Not so bad...hah!  Within minutes I was drenched (mind you, I am still a little sick) and watching the clock for that lovely ten minutes at the end where we lay down on our mats and meditate (aka, nap).  I am glad that I did go back, but man, I forgot that pilates is no joke!

9.7.10

Ravishing in Red

Last night the heat wave finally broke and this afternoon I was able to enter my sewing room without risking heat stroke.  Wednesday I was suffering from withdrawal and tried to do some sewing but just having the iron on made it way too hot.

This afternoon I worked on a block for one of the bees that I am in, Ravishing in Red.  Sara wanted us to make stars for a floating star quilt.  Since she gave us carte blanche on the type of star, I chose the Five Pointed Star and I think it turned out quite nice.  I hope she likes it!

6.7.10

Hot Hot Hot!

The past few days have been the warmest this summer, and with no a/c I am melting!

Despite the heat, we did manage to get out a bit this past weekend. When I heard that the Tall Ships were at the Toronto Waterfront Festival, I knew I needed to take a trip down to see them.  One thing that I love is water and wish that my home floated, so that we could sail it down somewhere tropical.  Ahhh, only in my dreams I'm afraid (for now)!

This is the Europa from The Netherlands.


After we wandered around the waterfront for a bit looking at all of the ships, we headed up Spadina for some lunch at Jumbo Empanadas in Kensington.


I worked for a few months near Kensington and really enjoyed eating at Jumbo Empanadas.  I love their beef empanadas and their salsa is fantastic.  Andrew had never been there before, so when we decided to go down to Toronto, I knew right away that I wanted to bring him there for lunch.  Being so close, how could I resist!

And for the quilters/sewists out there, I thought you would enjoy this picture.  This sculpture at the corner of Richmond and Spadina is a great representation of the Fashion District.  You can find stores in Toronto's Fashion District that only sell buttons.  Buttons!  I love it, and can wander those streets all day looking in all the great little shops.


This sculpture is of a giant thimble resting on a stack of buttons. Sitting on a corner, there is also a measuring tape that follows the curve of the corner and heads on down the street (you can see it at the bottom of the picture).

That was our Sunday, hot but fun!

3.7.10

Wash Day

As I mentioned in a previous post, I am working on processing some second hand men's shirts to make a log cabin quilt.  Today (finally!) I finished cutting up all of the shirts and gave them a good soak before hanging them on the line to dry.  I have to say that I really do enjoy the look of fabric drying on the line.


While I was hanging out the shirt pieces, my silly Oliver rolled around in the grass like a goof.


It's pretty much his favourite pastime and he is just too darn cute doing it!